695b48cb4db6fe507b636de2ea43ff1e


Are you having trouble getting your Cricut blade to cut through materials like paper, vinyl, and fabric? If so, you may need to sharpen your blade. Fortunately, you don’t need to buy a special sharpening tool to do this. You can use aluminum foil to sharpen your Cricut blade quickly and easily. In this article, we’ll provide a step-by-step guide to help you sharpen your Cricut blade with foil.
How do you sharpen Cricut blades with foil
Cricut blades are essential for crafting projects, but they can become dull over time. Fortunately, there is an easy and inexpensive way to sharpen them using aluminum foil. This method is simple and can help you get the most out of your blades.
Steps to Sharpen Cricut Blades with Foil
To sharpen your Cricut blades with aluminum foil, you will need a piece of foil that is larger than the blade. Follow these steps:
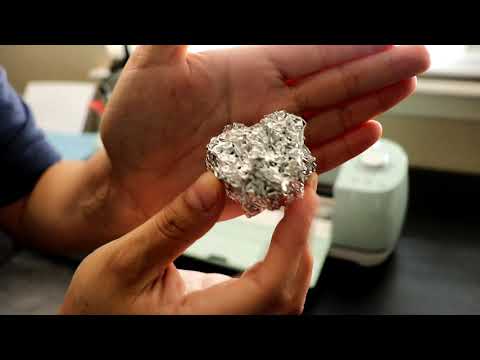
- Fold the foil – Fold the foil in half and then in half again. You should have four layers of foil.
- Place the blade – Place the blade on the foil so that the blade is in the center of the foil.
- Cut the foil – Cut the foil with the blade. Make sure to cut in one direction only.
- Repeat – Repeat this process several times until the blade is sharpened.
Once you have finished sharpening the blade, you can test it by cutting a piece of paper. If the blade is sharp enough, it should cut through the paper easily.
Benefits of Sharpening Cricut Blades with Foil
Sharpening your Cricut blades with aluminum foil has several benefits. It is an inexpensive and easy way to sharpen your blades. It also helps to extend the life of your blades, so you don’t have to replace them as often. Additionally, it can help you get the most out of your blades and ensure that your projects turn out the way you want them to.
Conclusion
Sharpening your Cricut blades with aluminum foil is a simple and cost-effective way to keep your blades in good condition. It can help you get the most out of your blades and ensure that your projects turn out the way you want them to. With a few simple steps, you can easily sharpen your blades and get back to crafting.
How do I know if my Cricut blade is dull
Using a Cricut machine is a great way to create beautiful and intricate designs for your projects. However, the quality of your work depends on the sharpness of your blade. If your blade is dull, it won’t be able to cut through materials as easily and accurately as it should. So, how do you know if your Cricut blade is dull?
Signs of a Dull Blade
The most obvious sign of a dull blade is that it won’t cut through materials as easily as it should. If you’re having to press down harder than usual to get the blade to cut, then it’s likely that your blade is dull. You may also notice that the blade is leaving jagged edges on your cuts, or that it’s not cutting all the way through the material. If you’re having any of these issues, then it’s time to replace your blade.
Replacing Your Blade
Replacing your blade is a simple process. First, you’ll need to remove the old blade from the Cricut machine. To do this, you’ll need to press the blade release button and then carefully remove the blade. Once the old blade is removed, you can insert the new blade into the machine. Make sure that the blade is securely in place before you start using it.
Maintaining Your Blade
To keep your blade in good condition, it’s important to clean it regularly. You can use a soft cloth and rubbing alcohol to clean the blade. This will help to remove any debris that may be stuck to the blade and will help to keep it sharp for longer. You should also make sure to store your blade in a safe place when it’s not in use.
Conclusion
Knowing when to replace your Cricut blade is an important part of using your machine. If you’re having trouble cutting through materials, or if your cuts are leaving jagged edges, then it’s likely that your blade is dull. Replacing your blade is a simple process, and you should also make sure to clean and store your blade properly to keep it in good condition.
How do I change my Cricut blade to scoring wheel
If you’re a Cricut user, you know that the machine is capable of cutting and scoring a variety of materials. To do this, you need to switch out the blade for a scoring wheel. Changing the blade is a simple process that can be done in a few steps.
Step 1: Prepare the Machine
Before you can change the blade, you need to prepare the machine. Start by turning off the power and unplugging the machine. Then, open the clamp and remove the blade. You can do this by pressing the clamp release button and then pulling the blade out.
Step 2: Insert the Scoring Wheel
Once the blade is removed, you can insert the scoring wheel. To do this, insert the scoring wheel into the clamp and then press the clamp release button to secure it. Make sure the wheel is firmly in place before continuing.
Step 3: Test the Wheel
Once the scoring wheel is in place, you can test it to make sure it’s working properly. To do this, turn on the power and select a scoring project. The machine should start scoring the material. If it doesn’t, you may need to adjust the pressure or replace the wheel.
Step 4: Clean Up
Once you’ve tested the wheel and it’s working properly, you can clean up. Make sure to remove any debris from the blade area and wipe down the machine. This will help keep your machine in good condition and ensure that it’s ready for your next project.
Conclusion
Changing the blade on your Cricut machine from a blade to a scoring wheel is a simple process. All you need to do is prepare the machine, insert the scoring wheel, test it, and then clean up. With a few simple steps, you can easily switch out the blade and get started on your next project.
How do you adjust the blade depth on a Cricut maker
The Cricut Maker is a powerful cutting machine that can be used to create a variety of projects. It is important to understand how to adjust the blade depth on the Cricut Maker in order to get the best results. This article will explain how to adjust the blade depth on a Cricut Maker.
Step 1: Prepare the Cricut Maker
Before adjusting the blade depth, you will need to prepare the Cricut Maker. Make sure that the machine is powered off and unplugged. Then, open the lid and remove the blade and housing from the machine.
Step 2: Adjust the Blade Depth
Once the blade and housing have been removed, you can adjust the blade depth. To do this, use a small flathead screwdriver to turn the adjustment screw on the blade housing. Turn the screw clockwise to increase the blade depth, or counterclockwise to decrease the blade depth.
Step 3: Reinstall the Blade and Housing
Once the blade depth has been adjusted, you can reinstall the blade and housing. Make sure that the blade is securely inserted into the housing, and then place the housing back into the Cricut Maker. Close the lid and plug the machine back in.
Conclusion
Adjusting the blade depth on a Cricut Maker is a simple process that can be done in a few steps. Make sure to prepare the machine before adjusting the blade depth, and then use a small flathead screwdriver to turn the adjustment screw. Once the blade depth has been adjusted, reinstall the blade and housing and plug the machine back in.
We hope this guide has been helpful in sharpening your Cricut blade with foil. We wish you the best of luck in your crafting endeavors! Goodbye and take care!