71fbf7799548946f74ced17daf6252a8


Are you having trouble getting your Cricut blade to cut through materials? If so, you may need to sharpen your blade. Sharpening a Cricut blade is a simple process that can be done in a few easy steps. In this article, we will provide a step-by-step guide on how to sharpen a Cricut blade. We will also discuss the importance of sharpening your blade and how to maintain it. With this guide, you will be able to get your Cricut blade back to its optimal performance in no time.
How do you sharpen a Cricut blade at home
If you own a Cricut machine, you know that the blades are essential for cutting and writing. Over time, the blades can become dull and need to be sharpened. Fortunately, you can sharpen your Cricut blades at home with a few simple tools. Here’s how to do it.
Step 1: Gather Your Supplies
Before you begin, you’ll need to gather the following supplies:
- A Cricut blade
- A pair of tweezers
- A small piece of sandpaper
- A pair of safety glasses
Step 2: Remove the Blade
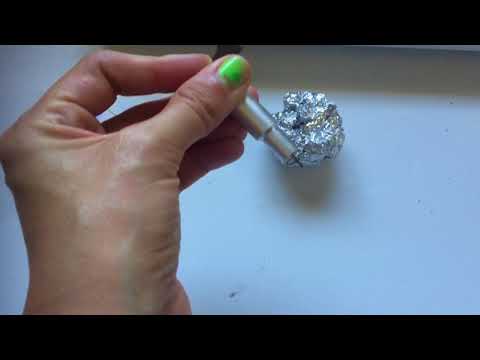
Once you have all of your supplies, you’ll need to remove the blade from the Cricut machine. To do this, use the tweezers to carefully remove the blade from the machine. Be sure to wear safety glasses to protect your eyes.
Step 3: Sharpen the Blade
Once the blade is removed, you can begin sharpening it. Take the sandpaper and gently rub it against the blade in a circular motion. Be sure to use light pressure and to keep the blade moving. This will help to sharpen the blade and remove any burrs or imperfections.
Step 4: Reinstall the Blade
Once you have finished sharpening the blade, you can reinstall it in the Cricut machine. Use the tweezers to carefully place the blade back in the machine. Be sure to wear safety glasses to protect your eyes.
Conclusion
Sharpening a Cricut blade at home is a simple process that can help to extend the life of your blades. With the right supplies and a bit of patience, you can easily sharpen your blades and get back to crafting.
Can you sharpen a Cricut maker blade
Cricut Maker blades are designed to be long-lasting and durable, but they can become dull over time. If you’re wondering if you can sharpen a Cricut Maker blade, the answer is yes. It’s possible to sharpen a Cricut Maker blade, but it’s important to do it correctly to avoid damaging the blade.
The first step in sharpening a Cricut Maker blade is to remove it from the machine. Once the blade is removed, you can use a sharpening stone or a diamond sharpening stone to sharpen the blade. It’s important to use a light touch when sharpening the blade, as too much pressure can damage the blade.
Once the blade is sharpened, it’s important to clean it thoroughly. Use a soft cloth to wipe away any debris or dust that may have accumulated on the blade. You can also use a cotton swab to clean the blade. Once the blade is clean, you can re-install it in the Cricut Maker.
Sharpening a Cricut Maker blade is a relatively simple process, but it’s important to take the necessary precautions to ensure that the blade is not damaged. If you’re not comfortable sharpening the blade yourself, you can take it to a professional sharpening service. They will be able to sharpen the blade correctly and safely.
In conclusion, it is possible to sharpen a Cricut Maker blade. However, it’s important to take the necessary precautions to ensure that the blade is not damaged. If you’re not comfortable sharpening the blade yourself, you can take it to a professional sharpening service.
How do I know if my Cricut blade is dull
Using a Cricut machine is a great way to create beautiful and intricate designs for your projects. However, the quality of your work depends on the sharpness of your blade. If your blade is dull, it won’t be able to cut through materials as easily and accurately as it should.
So, how do you know if your Cricut blade is dull?
Signs of a Dull Blade
The most obvious sign of a dull blade is that it won’t cut through materials as easily as it should. If you’re having to press down harder than usual to get the blade to cut, then it’s likely that your blade is dull. You may also notice that the blade is leaving jagged edges on your cuts, or that it’s not cutting all the way through the material. If you’re having any of these issues, then it’s time to replace your blade.
Replacing Your Blade
Replacing your blade is a simple process. First, you’ll need to remove the old blade from the Cricut machine. To do this, you’ll need to press the blade release button and then carefully remove the blade. Once the old blade is removed, you can insert the new blade into the machine. Make sure that the blade is securely in place before you start using it.
Maintaining Your Blade
To keep your blade in good condition, it’s important to clean it regularly. You can use a soft cloth and rubbing alcohol to clean the blade. This will help to remove any debris that may be stuck to the blade and will help to keep it sharp for longer. You should also make sure to store your blade in a safe place when it’s not in use.
Conclusion
Knowing when to replace your Cricut blade is an important part of using your machine. If you’re having trouble cutting through materials, or if your cuts are leaving jagged edges, then it’s likely that your blade is dull. Replacing your blade is a simple process, and you should also make sure to clean and store your blade properly to keep it in good condition.
How do I adjust the depth of my Cricut blade
If you own a Cricut machine, you know that the depth of the blade is an important factor in the quality of your projects. The depth of the blade determines how deeply it cuts into the material, and if it is set too shallow, it may not cut all the way through. On the other hand, if it is set too deep, it can cause the material to tear or fray. Fortunately, adjusting the depth of the blade is a relatively simple process.
Steps to Adjust the Depth of Your Cricut Blade
1. Turn off your Cricut machine and unplug it from the power source.
2. Locate the blade housing on the side of the machine.
3. Use a flathead screwdriver to loosen the screw on the blade housing.
4. Carefully slide the blade housing up or down to adjust the depth of the blade.
5. Tighten the screw on the blade housing once you have adjusted the blade to the desired depth.
6. Plug the machine back in and turn it on to test the new blade depth.
Tips for Adjusting the Blade Depth
When adjusting the blade depth, it is important to make sure that the blade is not set too deep. If the blade is set too deep, it can cause the material to tear or fray.
It is also important to make sure that the blade is not set too shallow. If the blade is set too shallow, it may not cut all the way through the material.
If you are unsure of the correct blade depth for a particular material, consult the Cricut user manual or the Cricut website for more information.
We hope this guide has been helpful in teaching you how to sharpen a Cricut blade. With a few simple steps, you can keep your blades sharp and your projects looking great.
Thank you for reading, and goodbye!