9da4dbfad78b61ef14eb979f5bed09da


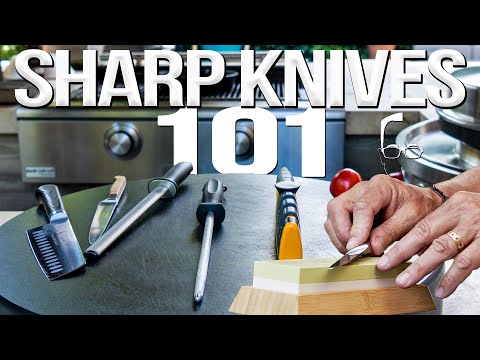
Cooking is an art form, and having the right tools can make all the difference. The Sharp Foil Knife is the perfect kitchen tool for any home chef. This versatile knife is designed to make food preparation easier and more efficient. It can be used to cut, slice, and dice a variety of foods, from fruits and vegetables to meats and cheeses. With its sharp blade and comfortable handle, the Sharp Foil Knife is the perfect addition to any kitchen. In this article, we will discuss the features and benefits of this amazing kitchen tool.
Aluminum foil knife sharpening
Sharpening knives is an important part of kitchen maintenance. It is important to keep your knives sharp to ensure that they are safe and effective to use. While there are many methods of sharpening knives, one of the most popular is aluminum foil knife sharpening. This method is simple, inexpensive, and can be done in the comfort of your own home.
To sharpen a knife using aluminum foil, you will need a piece of aluminum foil that is large enough to cover the blade of the knife. Place the aluminum foil on a flat surface and then place the blade of the knife on the foil. Make sure that the blade is flat against the foil. Then, using a back and forth motion, move the blade across the foil. This will help to sharpen the blade of the knife.
When sharpening a knife with aluminum foil, it is important to use a light pressure. Too much pressure can damage the blade of the knife. It is also important to use a consistent motion when sharpening the knife. This will help to ensure that the blade is sharpened evenly.
Aluminum foil knife sharpening is a great way to keep your knives sharp and in good condition. It is an inexpensive and easy way to sharpen your knives without having to purchase a professional sharpening tool. With a little practice, you can easily sharpen your knives using aluminum foil.
How to sharpen knife at home without sharpener
Sharpening a knife is an important part of kitchen maintenance. A sharp knife is safer to use and will make your cooking tasks easier. While it is possible to buy a knife sharpener, it is also possible to sharpen a knife without one. Here are some tips on how to sharpen a knife at home without a sharpener.
Using a Whetstone
A whetstone is a flat stone used to sharpen knives. It is important to use a whetstone that is appropriate for the type of knife you are sharpening. For example, a coarse stone should be used for a dull knife, while a fine stone should be used for a knife that is already sharp.
To sharpen a knife with a whetstone, start by soaking the stone in water for 10 minutes. Then, place the stone on a damp cloth and hold the knife at a 20-degree angle against the stone. Push the blade away from you and pull it back towards you in a sawing motion. Repeat this process on both sides of the blade until it is sharp.
Using a Steel Rod
A steel rod is another tool that can be used to sharpen a knife. To use a steel rod, hold the rod in one hand and the knife in the other. Place the blade of the knife against the rod at a 20-degree angle and pull the blade towards you. Repeat this process on both sides of the blade until it is sharp.
Using a Ceramic Mug
A ceramic mug can also be used to sharpen a knife. To use a ceramic mug, hold the mug in one hand and the knife in the other. Place the blade of the knife against the inside of the mug and pull the blade towards you. Repeat this process on both sides of the blade until it is sharp.
Conclusion
Sharpening a knife without a sharpener is possible with the right tools. A whetstone, steel rod, or ceramic mug can all be used to sharpen a knife. It is important to use the right tool for the type of knife you are sharpening and to use the correct angle when sharpening. With a little practice, you can easily sharpen your knives at home without a sharpener.
Best way to sharpen a knife razor sharp
Sharpening a knife is an important skill to have, and it can be done in a variety of ways. The best way to sharpen a knife razor sharp is to use a sharpening stone. Sharpening stones come in a variety of sizes and grits, and they can be used to sharpen any type of knife.
The first step in sharpening a knife is to select the right sharpening stone. A coarse stone should be used for dull knives, while a finer stone should be used for sharper knives. Once the stone is selected, it should be soaked in water for at least 10 minutes.
The next step is to hold the knife at a 20-degree angle against the stone. The blade should be moved in a circular motion, starting at the heel of the blade and working towards the tip. This should be done on both sides of the blade, and the process should be repeated until the blade is sharp.
Once the blade is sharp, it should be honed with a honing steel. This will help to maintain the sharpness of the blade and prevent it from becoming dull. The honing steel should be held at a 20-degree angle against the blade and the blade should be moved in a circular motion.
Finally, the blade should be stropped on a leather strop. This will help to remove any burrs or imperfections on the blade and will help to maintain the sharpness of the blade. The strop should be held at a 20-degree angle against the blade and the blade should be moved in a circular motion.
Sharpening a knife razor sharp is not a difficult task, but it does require patience and practice. With the right tools and techniques, anyone can sharpen a knife razor sharp.
How to sharpen kitchen knives with a stone
Sharpening kitchen knives is an important part of kitchen maintenance. A sharp knife is safer to use and will make your cooking tasks easier. The best way to sharpen kitchen knives is with a sharpening stone. Here are the steps to follow when sharpening kitchen knives with a stone.
Step 1: Gather the Supplies
You will need a sharpening stone, a honing steel, a damp cloth, and a pair of protective gloves. Make sure the stone is wet before you begin.
Step 2: Position the Knife
Hold the knife at a 20-degree angle against the stone. Make sure the blade is facing away from you. Keep the angle consistent throughout the sharpening process.
Step 3: Move the Knife
Move the knife in a circular motion across the stone. Start at the heel of the blade and move towards the tip. Make sure to keep the angle consistent. Do this for both sides of the blade.
Step 4: Check the Edge
Check the edge of the blade to make sure it is sharp. If it is not, repeat steps 2 and 3 until the blade is sharp.
Step 5: Use the Honing Steel
Once the blade is sharp, use the honing steel to realign the edge of the blade. Hold the honing steel at a 20-degree angle and move the blade in a circular motion against the steel. Do this for both sides of the blade.
Step 6: Clean the Knife
Once you are done sharpening the knife, use a damp cloth to wipe away any metal shavings. Make sure to dry the blade thoroughly before storing it.
Conclusion
Sharpening kitchen knives with a stone is a simple process that will help keep your knives in top condition. Make sure to use the proper safety equipment and follow the steps outlined above for best results.
How to sharpen a knife at home with a sharpener
Sharpening a knife is an important part of kitchen maintenance. A sharp knife is safer to use and will make your cooking tasks easier. Fortunately, you don’t need to be a professional to sharpen your knives. With the right tools and a bit of practice, you can sharpen your knives at home with a sharpener.
Step 1: Choose the Right Sharpener
The first step in sharpening a knife is to choose the right sharpener. There are several types of sharpeners available, including electric, manual, and stone sharpeners. Electric sharpeners are the easiest to use, but they can be expensive. Manual sharpeners are more affordable and can be used on a variety of knives. Stone sharpeners are the most traditional option and require a bit of practice to use correctly.
Step 2: Prepare the Knife
Before you begin sharpening, you’ll need to prepare the knife. Start by cleaning the blade with a damp cloth. This will remove any dirt or debris that could interfere with the sharpening process.
Once the blade is clean, you’ll need to secure it in the sharpener. Most sharpeners have a clamp or holder that you can use to secure the knife.
Step 3: Sharpen the Knife
Once the knife is secure, you can begin sharpening. If you’re using an electric sharpener, simply turn it on and move the blade back and forth in the slots. If you’re using a manual sharpener, you’ll need to move the blade back and forth in the slots with a steady, even pressure. If you’re using a stone sharpener, you’ll need to move the blade in a circular motion against the stone.
Step 4: Test the Knife
Once you’ve finished sharpening the knife, you’ll need to test it. To do this, simply cut a piece of paper. If the knife cuts through the paper easily, it’s sharp enough. If not, you’ll need to repeat the sharpening process.
Step 5: Clean and Store the Knife
Once you’ve finished sharpening the knife, you’ll need to clean and store it. Start by wiping the blade with a damp cloth to remove any metal shavings. Then, dry the blade with a clean cloth. Finally, store the knife in a safe place, such as a knife block or drawer.
Sharpening a knife at home with a sharpener is a simple process. With the right tools and a bit of practice, you can keep your knives sharp and ready for use.
How to sharpen a knife with a stone for beginners
Sharpening a knife with a stone is a skill that can be learned with practice. It is important to understand the basics of sharpening a knife with a stone before attempting to do so. This article will provide a step-by-step guide for beginners on how to sharpen a knife with a stone.
Step 1: Gather the Necessary Materials
The first step in sharpening a knife with a stone is to gather the necessary materials. You will need a sharpening stone, a honing oil, a cloth, and a knife. The sharpening stone should be a medium-grit stone, such as a 1000-grit stone. The honing oil is used to lubricate the stone and prevent it from clogging with metal particles. The cloth is used to wipe away any excess oil or metal particles.
Step 2: Prepare the Stone
Once you have gathered the necessary materials, the next step is to prepare the stone. Start by soaking the stone in water for 10-15 minutes. This will help to remove any debris or dirt that may be on the stone. Once the stone is soaked, use the cloth to wipe away any excess water.
Step 3: Apply the Honing Oil
Once the stone is prepared, the next step is to apply the honing oil. Use the cloth to apply a thin layer of oil to the stone. This will help to lubricate the stone and prevent it from clogging with metal particles.
Step 4: Begin Sharpening
Now that the stone is prepared and the honing oil is applied, it is time to begin sharpening the knife. Start by placing the knife on the stone at a 20-degree angle. Then, using a back-and-forth motion, slowly move the knife across the stone. Make sure to keep the angle consistent throughout the sharpening process. After a few passes, you should start to see a burr forming on the edge of the blade.
Step 5: Finish Sharpening
Once the burr has formed, it is time to finish sharpening the knife. To do this, flip the knife over and repeat the same process on the other side of the blade. Make sure to keep the angle consistent and use a light pressure. Once both sides of the blade have been sharpened, use the cloth to wipe away any excess oil or metal particles.
Step 6: Test the Knife
The final step is to test the knife to make sure it is sharp. To do this, take a piece of paper and try to slice it with the knife. If the knife is sharp, it should easily slice through the paper. If the knife is not sharp, repeat the sharpening process until it is.
Sharpening a knife with a stone is a skill that can be learned with practice. By following the steps outlined in this article, you can learn how to sharpen a knife with a stone for beginners. With practice, you will be able to sharpen your knives with ease.
How to sharpen knife with handheld sharpener
Sharpening a knife is an important part of kitchen maintenance. A sharp knife is safer to use and will make your cooking tasks easier. Handheld sharpeners are a great way to keep your knives in top condition. Here are some tips on how to sharpen a knife with a handheld sharpener.
Step 1: Select the Right Sharpener
The first step in sharpening a knife with a handheld sharpener is to select the right sharpener for the job. Different sharpeners are designed for different types of knives. For example, a ceramic sharpener is best for ceramic knives, while a diamond sharpener is best for steel knives. Make sure you select the right sharpener for your knife.
Step 2: Position the Knife
Once you have selected the right sharpener, position the knife in the sharpener. Make sure the blade is facing away from you and the handle is facing towards you. Place the blade in the sharpener at a 20-degree angle. This is the optimal angle for sharpening a knife.
Step 3: Pull the Knife Through the Sharpener
Once the knife is in the correct position, pull the knife through the sharpener. Make sure to pull the knife in one smooth motion. Do not press down on the blade as this can damage the blade. Pull the knife through the sharpener several times until the blade is sharp.
Step 4: Test the Sharpness
Once you have finished sharpening the knife, test the sharpness of the blade. You can do this by slicing a piece of paper. If the knife slices through the paper easily, then the blade is sharp. If the knife does not slice through the paper easily, then you will need to repeat the sharpening process.
Step 5: Clean and Store the Knife
Once you have finished sharpening the knife, it is important to clean and store the knife properly. Wipe the blade with a damp cloth to remove any debris. Then, store the knife in a safe place, such as a knife block or a drawer. This will help keep the blade sharp and prevent it from becoming dull.
Sharpening a knife with a handheld sharpener is a simple process. With the right sharpener and a few simple steps, you can keep your knives in top condition. So, the next time you need to sharpen a knife, grab your handheld sharpener and get to work!
How to use knife sharpener rod
Sharpening a knife is an important part of kitchen maintenance. A knife sharpener rod is a great tool for keeping your knives in top condition. Here are some tips on how to use a knife sharpener rod correctly.
Step 1: Prepare the Knife
Before you begin sharpening, make sure the knife is clean and free of any debris. Wipe the blade with a damp cloth and dry it thoroughly. If the blade is very dull, you may need to use a honing steel first.
Step 2: Position the Knife
Hold the knife sharpener rod in one hand and the knife in the other. Place the blade of the knife against the rod at a 20-degree angle. Make sure the blade is flat against the rod and the tip of the blade is pointing away from you.
Step 3: Sharpen the Knife
Gently pull the knife down the length of the rod. Make sure to keep the blade flat against the rod and the angle consistent. Repeat this motion several times until the blade is sharp. You may need to apply more pressure if the blade is very dull.
Step 4: Test the Knife
Once you have finished sharpening the knife, test it by cutting a piece of paper. If the blade is sharp, it should easily cut through the paper. If not, repeat the sharpening process until the blade is sharp.
Step 5: Clean and Store the Knife
Once you have finished sharpening the knife, clean it with a damp cloth and dry it thoroughly. Store the knife in a safe place, away from children and pets.
Using a knife sharpener rod is a great way to keep your knives in top condition. With a few simple steps, you can easily sharpen your knives and keep them in good shape.
We hope this article has been helpful in introducing you to the amazing Sharp Foil Knife. It is truly the perfect kitchen tool for any home cook.
Thank you for reading and we wish you all the best in your culinary adventures! Goodbye!