e3686221cb29605307f5321ebd75dfb8


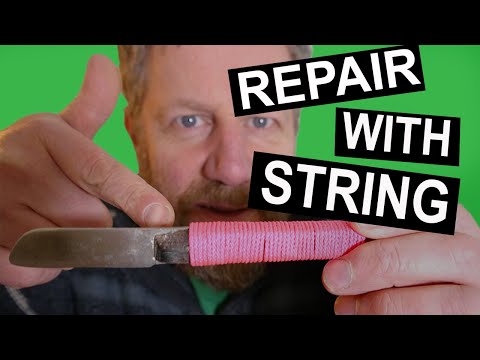
Do you have a knife with a broken handle? Don’t worry, it’s not the end of the world! With a few simple tools and a bit of patience, you can easily repair your knife handle and get it back to its former glory. In this article, we’ll provide a step-by-step guide on how to repair a knife handle. We’ll cover the materials you’ll need, the tools you’ll need, and the steps you’ll need to take to get the job done. So, let’s get started!
Can you repair a knife handle
Knives are essential tools in the kitchen, and a broken handle can make them unusable. Fortunately, it is possible to repair a knife handle, depending on the type of damage. Replacing a broken handle is the most common repair, and it is relatively easy to do. You will need a few basic tools and supplies, such as a drill, screws, and a new handle.
If the handle is cracked or chipped, you can repair it with epoxy. Clean the handle with a damp cloth and then apply the epoxy to the damaged area. Allow the epoxy to dry completely before using the knife. If the handle is loose, you can tighten it by removing the screws and adding a few drops of wood glue. Allow the glue to dry before re-screwing the handle.
If the handle is severely damaged, it may be best to replace it. You can purchase a new handle from a hardware store or online. Make sure the handle is the same size and shape as the original. You will need to drill holes in the new handle and attach it to the blade with screws. Be sure to use the correct size and type of screws for the handle.
Repairing a knife handle is not difficult, but it is important to take the necessary precautions. Always wear safety glasses and gloves when working with tools. Make sure the blade is securely attached to the handle before using the knife. With a few simple tools and supplies, you can easily repair or replace a broken knife handle.
What kind of glue do you use on a knife handle
When it comes to repairing a knife handle, the type of glue you use is important. The wrong glue can cause the handle to become brittle and break, or it can cause the handle to become loose and wobbly. To ensure that your knife handle is properly repaired, it is important to use the right type of glue.
Epoxy is one of the most popular types of glue used for knife handles. It is a strong adhesive that is resistant to water, heat, and chemicals. It is also very durable and can be used to repair a variety of materials, including wood, metal, and plastic. Epoxy is easy to use and can be found in most hardware stores.
Cyanoacrylate is another type of glue that is often used for knife handles. It is a fast-drying adhesive that is very strong and can be used to bond a variety of materials. It is also resistant to water and heat, making it a great choice for knife handles. Cyanoacrylate is available in a variety of forms, including liquid, gel, and spray.
Silicone is another type of glue that is often used for knife handles. It is a flexible adhesive that is resistant to water, heat, and chemicals. It is also very durable and can be used to repair a variety of materials, including wood, metal, and plastic. Silicone is easy to use and can be found in most hardware stores.
When choosing the right type of glue for your knife handle, it is important to consider the material of the handle and the type of repair you are doing. Different types of glue are better suited for different types of repairs, so it is important to choose the right one for the job. With the right type of glue, you can ensure that your knife handle is properly repaired and will last for years to come.
How do you recondition a wooden kitchen knife handle
Wooden kitchen knife handles are a classic choice for many chefs.
They are durable, attractive, and can last for years with proper care. However, over time, the wood can become dry and cracked, making it difficult to use. Fortunately, reconditioning a wooden kitchen knife handle is a relatively simple process.
Step 1: Clean the Handle
The first step in reconditioning a wooden kitchen knife handle is to clean it. Use a soft cloth and warm, soapy water to remove any dirt or debris. Be sure to rinse the handle thoroughly and dry it completely before moving on to the next step.
Step 2: Sand the Handle
Once the handle is clean, use a fine-grit sandpaper to gently sand away any rough spots or splinters. Be sure to sand in the direction of the grain to avoid damaging the wood. Once the handle is smooth, use a damp cloth to wipe away any dust.
Step 3: Apply Oil
Once the handle is clean and sanded, it’s time to apply oil. Use a food-safe oil, such as mineral oil or walnut oil, and apply it to the handle with a soft cloth. Rub the oil into the wood in a circular motion, making sure to cover the entire handle. Allow the oil to soak in for several minutes before wiping away any excess.
Step 4: Finish the Handle
Once the handle is oiled, it’s time to finish it. Use a wood finish of your choice, such as varnish or wax, and apply it to the handle with a soft cloth. Allow the finish to dry completely before using the knife.
Conclusion
Reconditioning a wooden kitchen knife handle is a relatively simple process. With a few basic tools and supplies, you can restore your handle to its original condition. Be sure to use food-safe oil and a wood finish of your choice to ensure the handle is safe to use.
What kind of oil do you use on a wooden knife handle
Wooden knife handles are a popular choice for many chefs and home cooks. They provide a classic look and feel that is both aesthetically pleasing and comfortable to use. However, to keep your wooden knife handle in top condition, it is important to use the right kind of oil.
Mineral oil is the most common type of oil used on wooden knife handles. It is a clear, odorless oil that is non-toxic and food safe. It is also relatively inexpensive and easy to find. Mineral oil helps to protect the wood from moisture and prevents it from cracking or warping. It also helps to keep the wood looking its best by providing a protective coating.
Another option is beeswax. This is a natural wax that is made by bees and is often used to protect wood. It is a bit more expensive than mineral oil, but it provides a more natural look and feel. Beeswax also helps to keep the wood from drying out and cracking.
Finally, linseed oil is another option. This is a natural oil that is made from flaxseed and is often used to protect wood. It is a bit more expensive than mineral oil, but it provides a more natural look and feel. Linseed oil also helps to keep the wood from drying out and cracking.
No matter which type of oil you choose, it is important to apply it regularly to keep your wooden knife handle in top condition. Make sure to follow the manufacturer’s instructions for the best results.
We hope this guide has been helpful in repairing your knife handle. With the right tools and a bit of patience, you can have your knife looking as good as new in no time.
Thank you for reading and we wish you the best of luck with your repair project. Goodbye!